
Membership
To set up the Membership page on your app and website, select the ‘Pages’ button on the navigation panel.
*Note* When adding or removing a page, you can be on either the ‘App’ or ‘Web’ view as any changes that are made will be updated on both.
Once the ‘Pages’ tab has been selected the app panel will appear with a list of the pages that are already applied to your app/website depending on what View you are on.
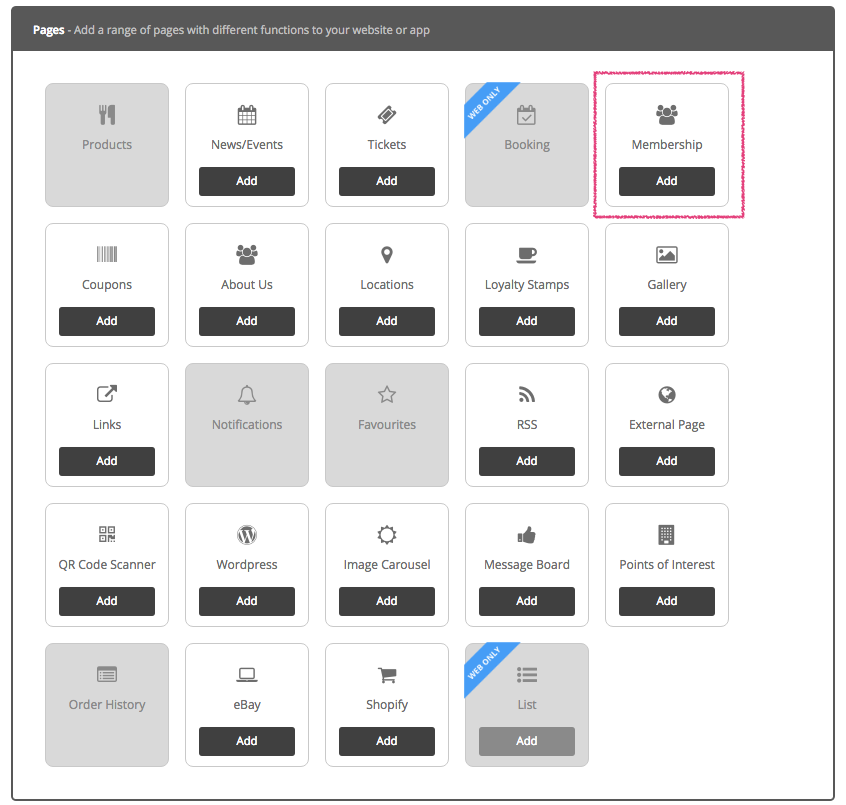
Click on Pages to see a ‘Manage’ button. Click this to access the Pages Library where you can pick and choose which features you would like on your app or website.
Please make sure you click on ‘App’ or ‘Web’ at the top of the CMS to make changes to your App or Website respectively.
To add pages to your app/website click on the ‘Pages’ tab on the left side navigation panel. Once you have clicked the ‘Pages’ tab, you will notice a blue ‘Manage’ button that will appear alongside the tab. Click this button to show the range of pages you can add to your app/website.
To add a page, press ‘Add’ at the bottom of each page/feature in the library. Once you’ve added on all pages, click on Close.
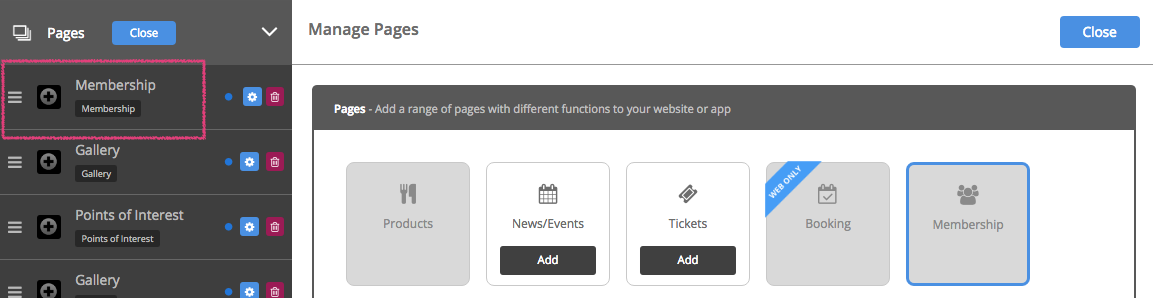
After the page has been added, you’ll see it under the ‘Pages’ section of the navigation panel on the left.
If you would like to change the name of a page and/or add an icon, click on the Manage button next to the Pages tab on the navigation panel.
Now press the cog on the right of the page you’d like to make changes to (under the Pages tab on the navigation panel).
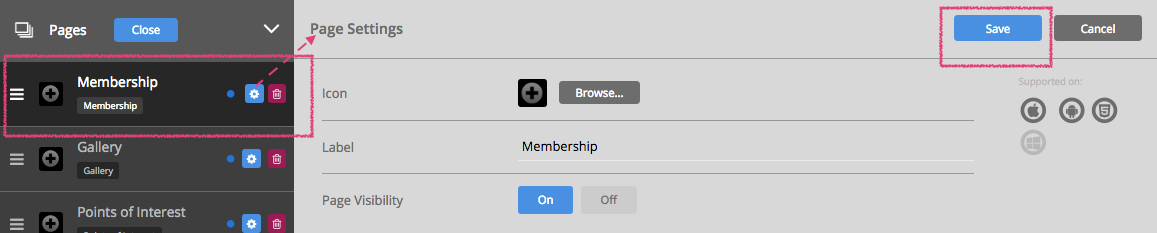
Edit the name of the page by adding in a new one, in the space provided for ‘Label’.
Page Visibility is set to ‘On’ by default. This shows a blue dot next to each Page (on the left of the cog on the navigation panel under ‘Pages’). Please click on ‘Off’ if you want to make the page invisible. The dot appears grey when you make the page invisible.
If you are in App View, choose an icon or upload your own custom icon by pressing the ‘browse’ button. Choose an icon from the list provided, or to upload your own icon press the ‘upload custom icon’ tab. To upload your custom icon drag and drop you 60 x 60 pixel image into the blue area, or press browse to find your icon manually. Press set when you have chosen your icon.
Please click on ‘Save’ on the top right of this section when you’ve finished customising the page.

To start editing your membership settings go to the ‘Membership module’ on the navigation panel.
* Please Note; this is not the one listed underneath ‘Pages’.
Click on the ‘Settings Tab’ underneath the membership module

Decide if you would like to make a force login/sign up, so that when your app or website is visited, a user might sign in.
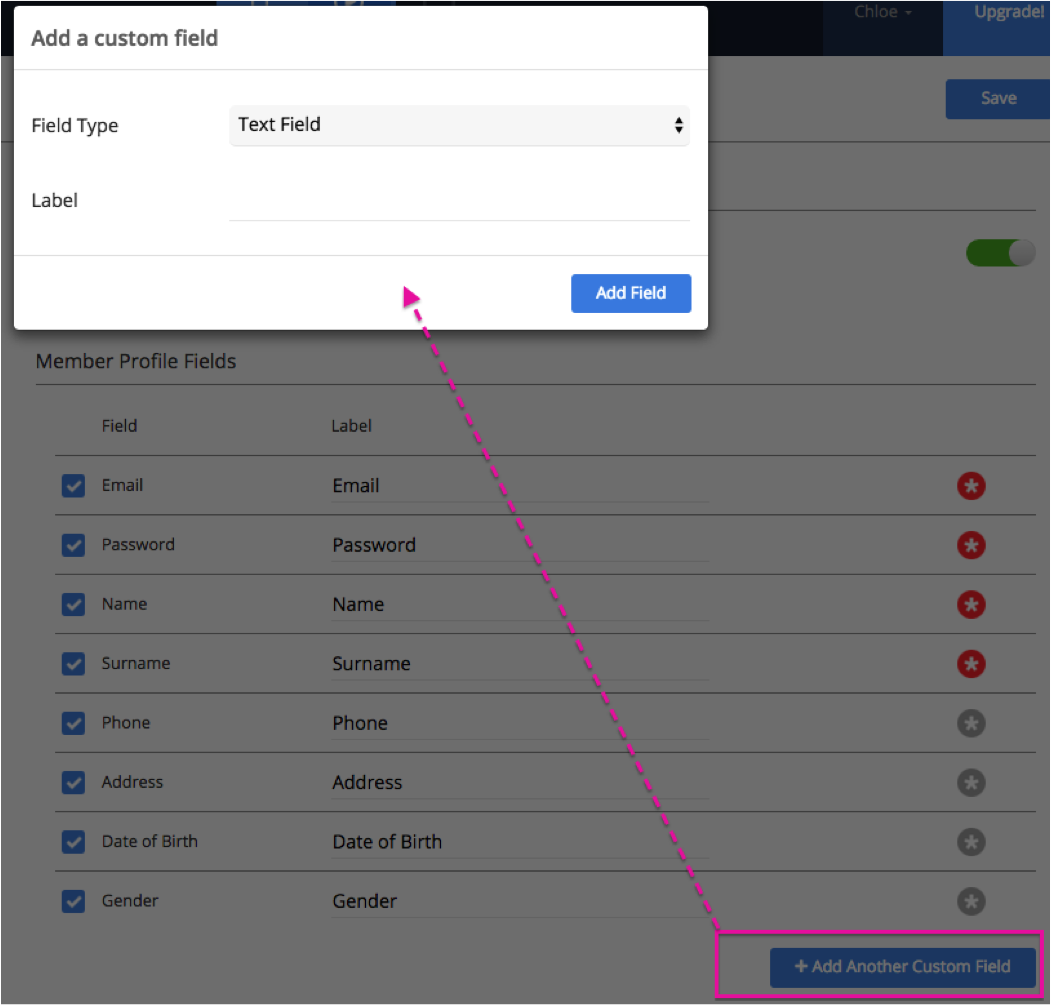
Fill out the details you would like to appear on the membership screen, if you want a custom field, click ‘Add another custom field’ and fill out the details you would like to appear.

Insert some Terms and Conditions if necessary, by filling out the text box
Press the save button once you’ve finished
Manage Subscribers
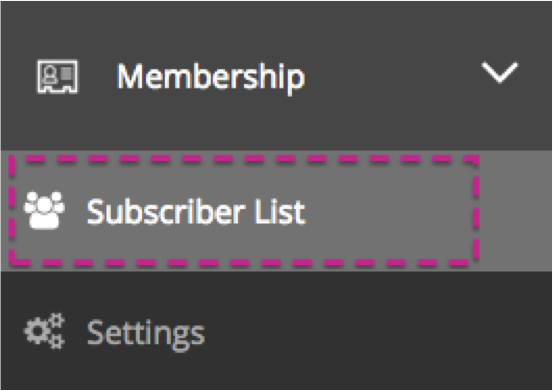
If your membership feature is live and you would like to view the subscriber list then navigate to ‘Subscriber List’, under the Membership tab. Here you will be able to see a list of all your subscribers including when they subscribed, their name and their email.
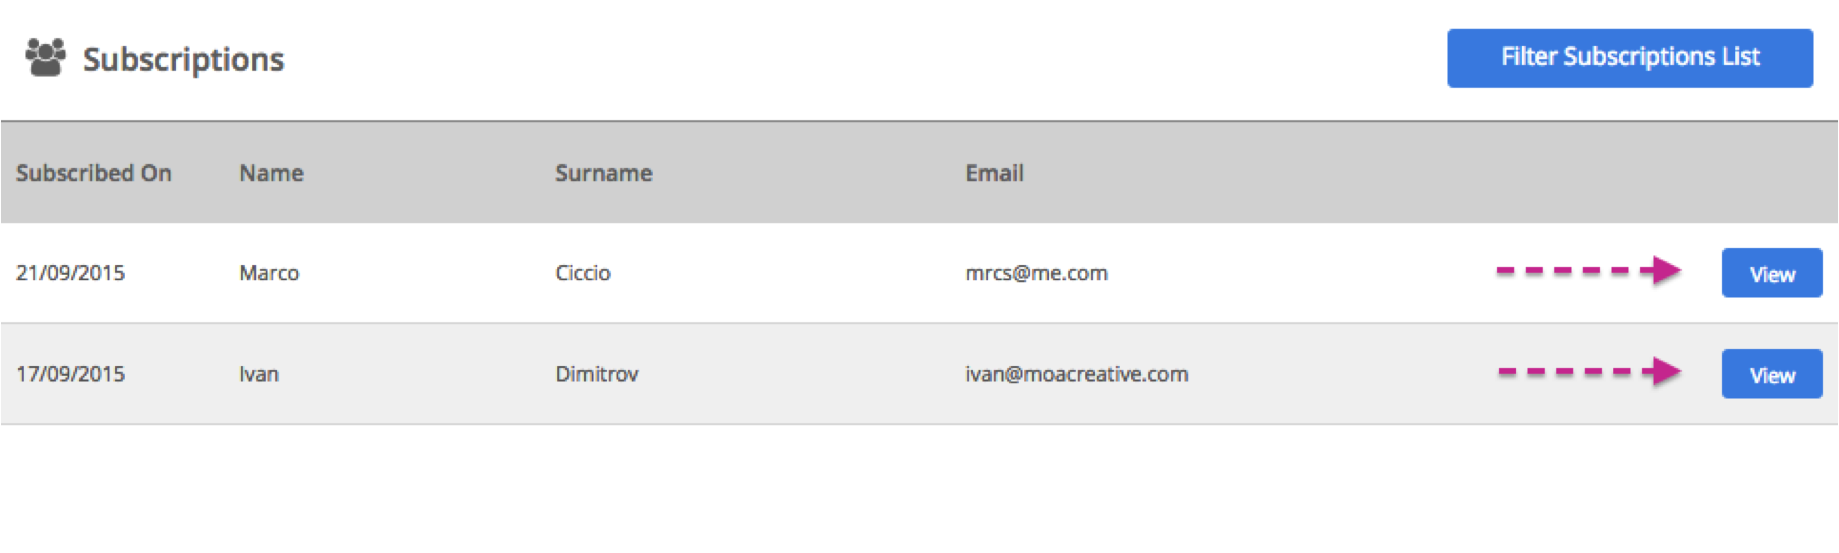
You can see the other details for a specific subscriber by pressing the blue ‘View’ button alongside the subscribers details.
Filter the subscription list by pressing the blue ‘Filter Subscription List’ button.
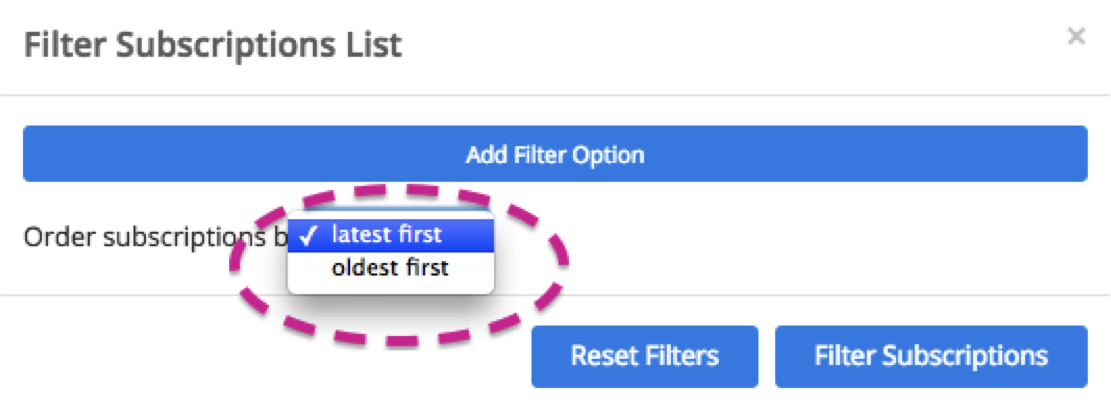
Add a filter option and choose how you would like to order the subscription Eg: by latest first and press filter subscriptions.
You can also add a filter option by choosing from the Default Fields and setting a condition for that option.

You can choose to send a push notification to all subscribers or to groups of subscribers (based on the current filter applied to the list) by pressing the ‘Send Notifications’ button.
Please use the filter to choose which subscribers you’d like to send a push notification to
Fill out your message and press ‘Send’.
Your Push Notification History will be updated to list the notifications sent to members with a simple icon to display the filter applied when sending the notification.