Message Board (Social Wall)
To set up the ’Message Board’ (also known as the ’Social Wall’) on your app , select the ‘Pages’ button on the navigation panel.
*Note* When adding or removing a page, you need to be on ‘App’ view as any changes that are made will be updated here. ‘Message Board’ is not available to use on the Website.
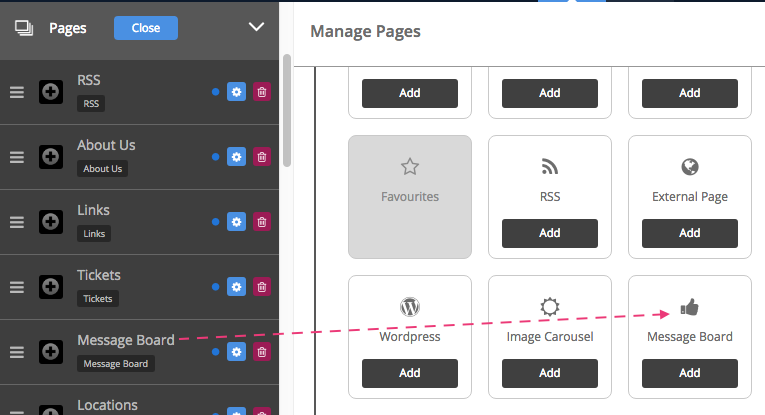
Click on ‘Pages’ on the navigation panel and then click on the blue button ‘Manage’ alongside it. The ‘Manage Pages’ section includes all features available to your app, depending on if you’re in App view.
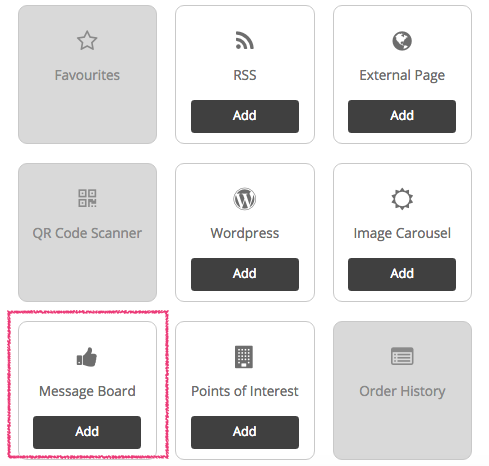
Click on the ‘Add’ button to enable ’Message Board’ for your app.
Once the page has been selected the navigation panel will appear with a list of the pages that are already applied to your app.
Please make sure you click on ‘App’ at the top of the CMS to make changes to your App.
To add pages to your app click on the ‘Pages’ tab on the left side navigation panel. Once you have clicked the ‘Pages’ tab, you will notice a blue ‘Manage’ button that will appear alongside the tab. Click this button to show the range of pages you can add to your app.
To add a page, press ‘Add’ at the bottom of each page/feature in the library. Once you’ve added on all pages, click on Close.
The Message Board can be duplicated. Click ‘add’ on the Manage Pages section to add this page as many times as required. Rename the page and use for different purposes.
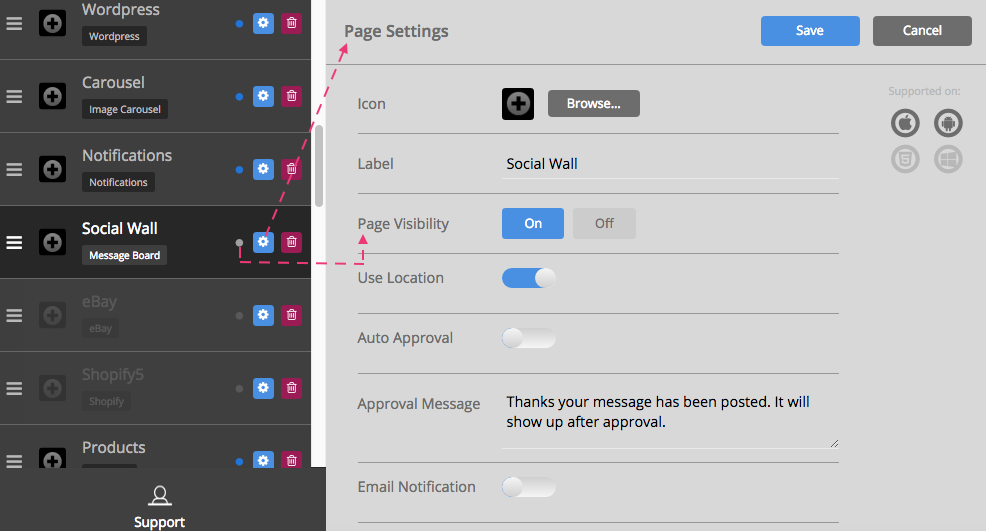
If you would like to change the name of the page and/or add an icon, click on the Manage button next to the Pages tab on the navigation panel.
Now press the cog on the right of the page (under the Pages tab on the navigation panel).
To choose an icon or to upload our own custom icon press the ‘browse’ button. Choose an icon from the list provided, or to upload your own icon press the ‘upload custom icon’ tab. To upload your custom icon drag and drop you 60 x 60 pixel image into the blue area, or press browse to find your icon manually. Press set when you have chosen your icon. Press save once you have finished customising your features name and icon.
Edit the name of the page by adding in a new one, in the space provided for ‘Label’.
Page Visibility is set to ‘On’ by default. This shows a blue dot next to the page (on the left of the cog on the navigation panel under ‘Pages’). Please click on ‘Off’ if you want to make the page invisible. The dot appears grey when you make the page invisible.
User Location can be turned on and off by sliding the button alongside. This will display the user’s location when they post to your Message Board or Social Wall.
You can leave the Auto Approval switch off (by default) to manually moderate what users post or not. Turn it on if no moderation is required.
If switched off, there is an Auto Approval message that goes out every time someone posts to the wall. This message can be edited.
You can activate the Email Notification. Just slide the button to blue.
Please click on ‘Save’ on the top right of this section when you’ve finished customising the page.
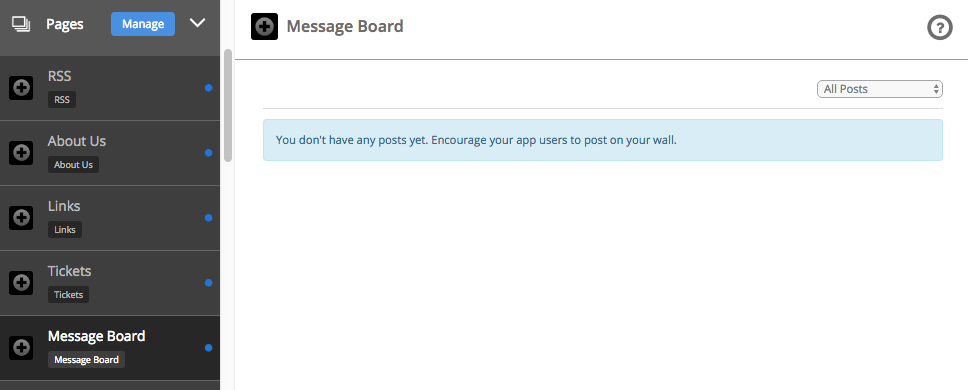
Navigate to the Pages section on the navigation panel.
Now click on the Message Board page.
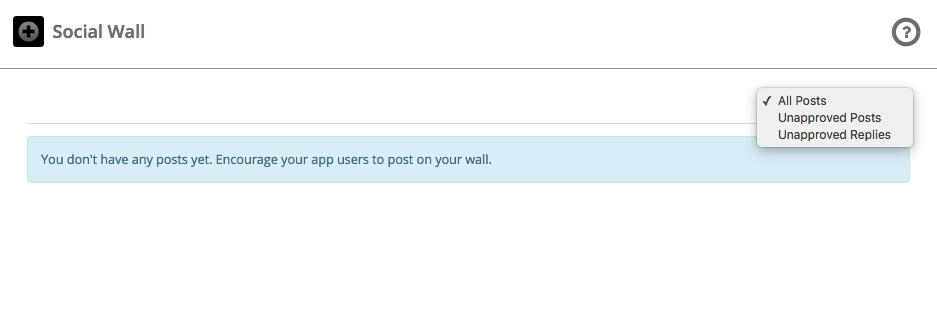
When it’s first setup, you’ll see this message – ‘You don’t have any posts yet. Encourage your app users to post on your wall.’
To view the Message Board on the app, download the Putti Preview App and navigate to the Message Board or Social Wall tab.
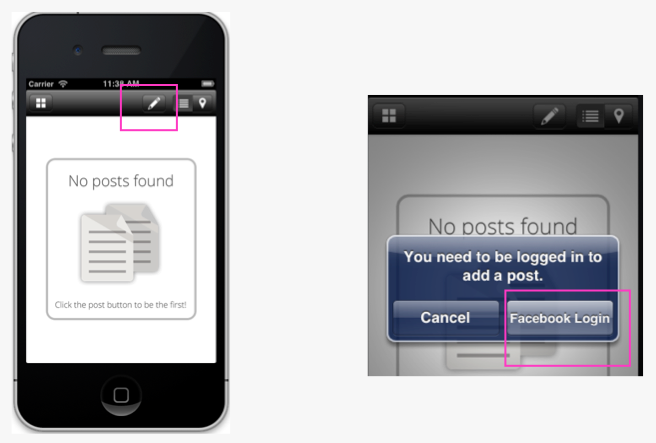
When accessing the new Message Board / Social Wall tab, it will initially show ‘No Posts Found’.
Click the ‘Post’ button to be the first to write a comment.
Click on the post/edit button to add one.
You’ll be prompted to login to Facebook. Click on ‘Facebook Login’ to do so.
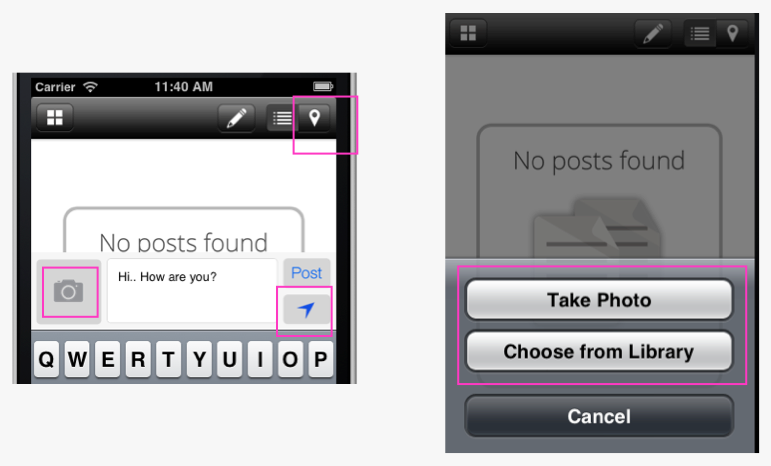
Enter text in the place provided for your post.
You can add an image to your post, (in .png/.jpg format and 640 x 427 pixels), if you’d like.
Images can be attached by tapping on the camera icon on the left.
Take a photo within the app, or upload an existing image from your photo library.
Tapping on the arrow below the post button will also send your current location settings and display your post in ‘map view’ also.
Once you’ve added a post, you will receive a message that the post has been added successfully.

