
News and Events
To set up the ’News/Events’ page on your app and website, select the ‘Pages’ button on the navigation panel.
*Note* When adding or removing a page, you can be on either the ‘App’ or ‘Web’ view as any changes that are made will be updated on both.
Click on ‘Pages’ on the navigation panel and then click on the blue button ‘Manage’ alongside it. The ‘Manage Pages’ section includes all features available to your app or website, depending on if you’re in App or Web view.
Click on the ‘Add’ button to enable ’News/Events’ for your app and/or website.
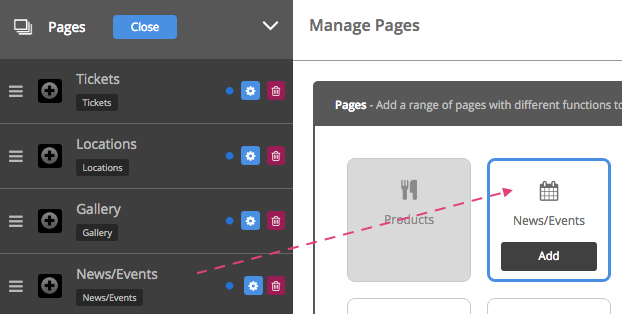
Once the ‘News/Events’ Page has been selected the navigation panel will appear with a list of the pages that are already applied to your app or website.
Please make sure you click on ‘App’ or ‘Web’ at the top of the CMS to make changes to your App or Website respectively.
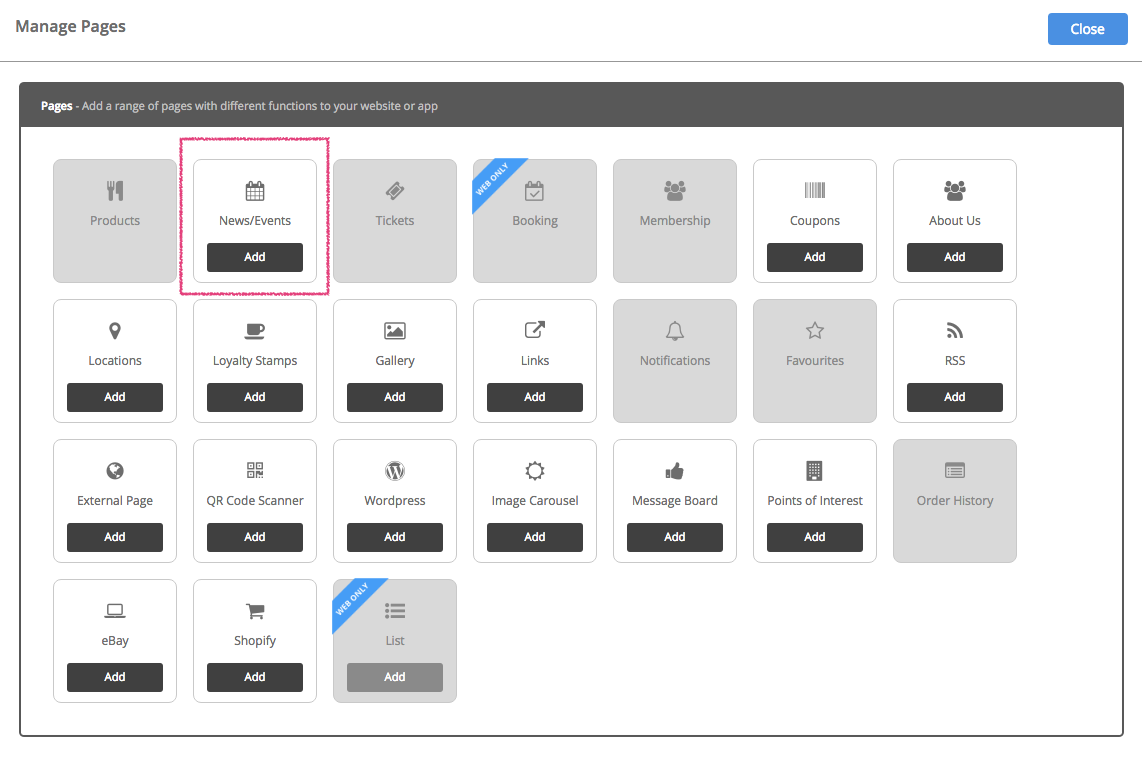
To add pages to your app/website click on the ‘Pages’ tab on the left side navigation panel. Once you have clicked the ‘Pages’ tab, you will notice a blue ‘Manage’ button that will appear alongside the tab. Click this button to show the range of pages you can add to your app/website.
To add a page, press ‘Add’ at the bottom of each page/feature in the library. Once you’ve added on all pages, click on Close.
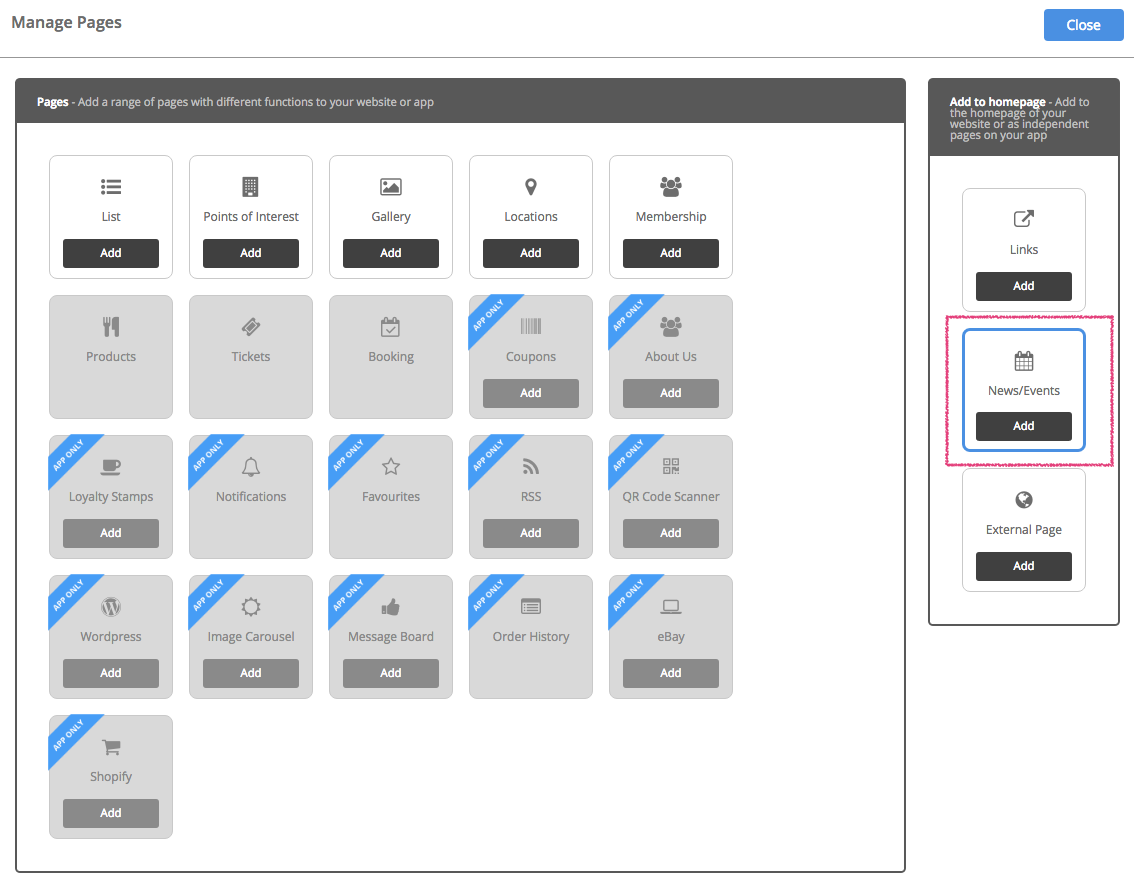
The News/Events page can be duplicated. Click ‘add’ on the Manage Pages section to add this page as many times as required.
For your Website
The News/Events page will appear on the Home Page of your website. If you’ve enabled more News/Events pages, you can choose to feature the one you want, on the Home Page.
The others would be visible as tabs that you click to access on the Home Page (depending on the template or layout you’ve picked).
Or, they’ll be accessible in the list of pages that come up when clicking on the collapse button to the top right of the Home Page.

After the page has been added, you’ll see it under the ‘Pages’ section of the navigation panel on the left.
If you would like to change the name of a page and/or add an icon, click on the Manage button next to the Pages tab on the navigation panel.
Now press the cog on the right of the page you’d like to make changes to (under the Pages tab on the navigation panel).
Edit the name of the page by adding in a new one, in the space provided for ‘Label’.
Page Visibility is set to ‘On’ by default. This shows a blue dot next to each Page (on the left of the cog on the navigation panel under ‘Pages’). Please click on ‘Off’ if you want to make the page invisible. The dot appears grey when you make the page invisible.
If you are in App View, choose an icon or upload your own custom icon by pressing the ‘browse’ button. Choose an icon from the list provided, or to upload your own icon press the ‘upload custom icon’ tab. To upload your custom icon drag and drop you 60 x 60 pixel image into the blue area, or press browse to find your icon manually. Press set when you have chosen your icon.
Please click on ‘Save’ on the top right of this section when you’ve finished customising the page.
Navigate to the Pages section on the navigation panel.
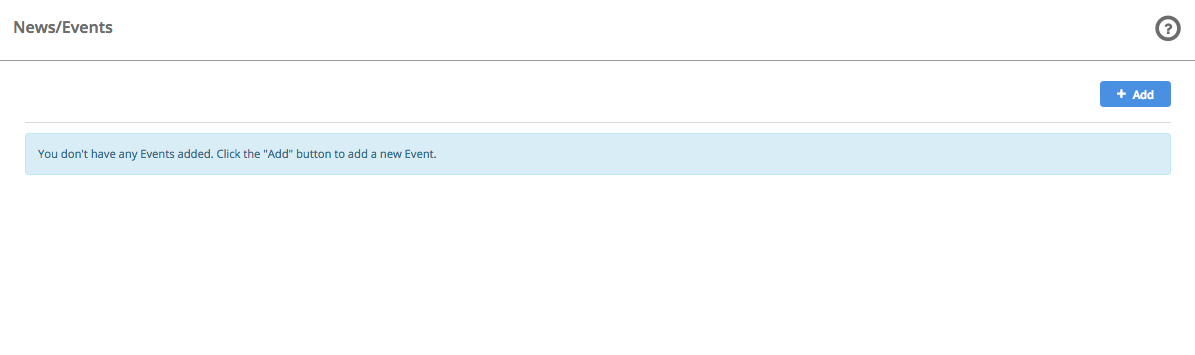
Now click on the News/Events page.
To add an event item click on the ‘Add’ button
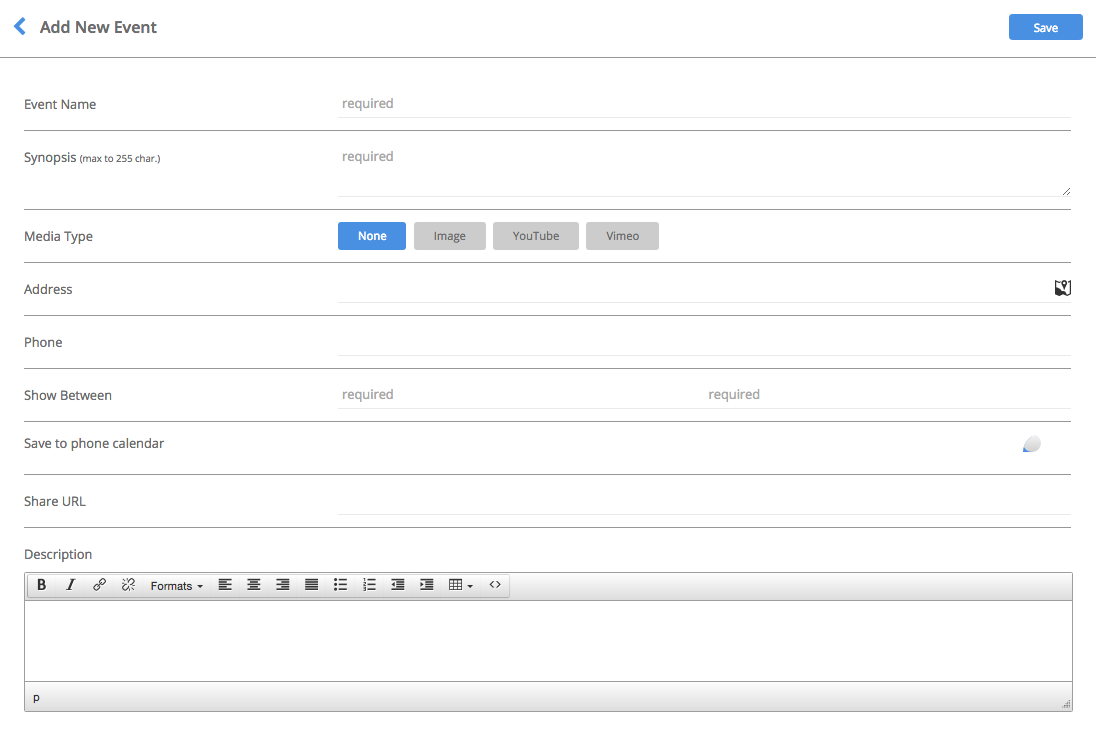
Fill in the event name and synopsis
You can choose to add media with either a image (A PNG/JPG at 640 x 427 pixels), or YouTube video or Vimeo by filling out the required URL
Fill out the rest of the details including the required type fields.
Choose when you would like your news/event to be shown between. Enable ‘Save to Phone Calendar’ and then key in the Event Date which is mandatory.
Fill out the URL you would like to link to if your event is shared (or leave blank).
Add a description on the news/event that you are adding
Press ‘Save’ once you’ve finished adding your news/event.
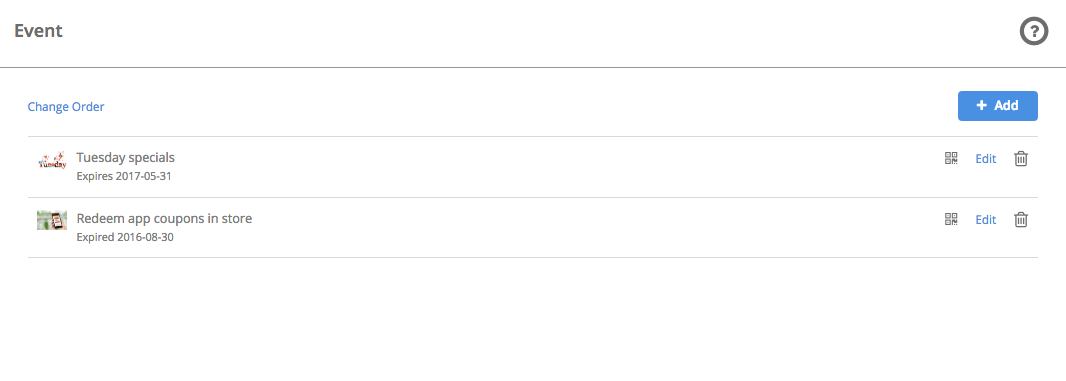
To add more events click ‘Add’ and follow the previous steps
You can edit your news/event by pressing the ‘Edit’ button or delete it by pressing the ‘Bin’ icon.
Change the order of your icons by selecting ‘Change Order’. Drag the dot icon to rearrange the order of your items. Press ‘Update New Order’ once you’ve finished.