
Places
To set up the ‘Points of Interest’ page (previously known as the places feature) on your app and website, select the ‘Pages’ button on the navigation panel.
*Note* When adding or removing this page, you can be on either the ‘App’ or ‘Web’ view as any changes that are made will be updated on both.
For Web View
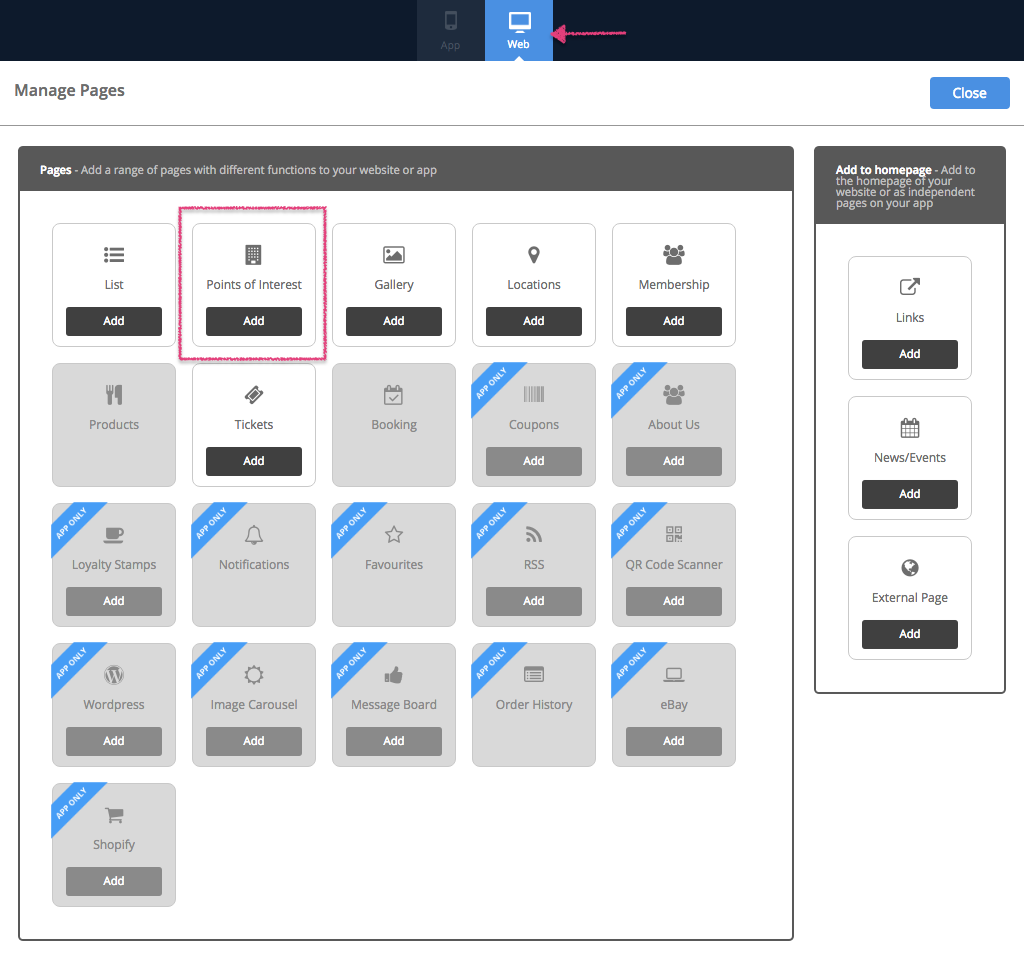
Ensure you are in Web View by checking if the ‘Web’ is highlighted in blue, at the top of the CMS.
To add pages to your website click on the ‘Pages’ tab on the left side navigation panel. Once you have clicked the ‘Pages’ tab, you will notice a blue ‘Manage’ button that will appear alongside the tab. Click this button to show the range of pages you can add to your website.
To add a page, press ‘Add’ at the bottom of each page/feature in the library. Once you’ve added it, click on Close.
After the page has been added, you’ll see it under the ‘Pages’ section of the navigation panel on the left.
If you would like to change the name of a page, click on the Manage button next to the Pages tab on the navigation panel.
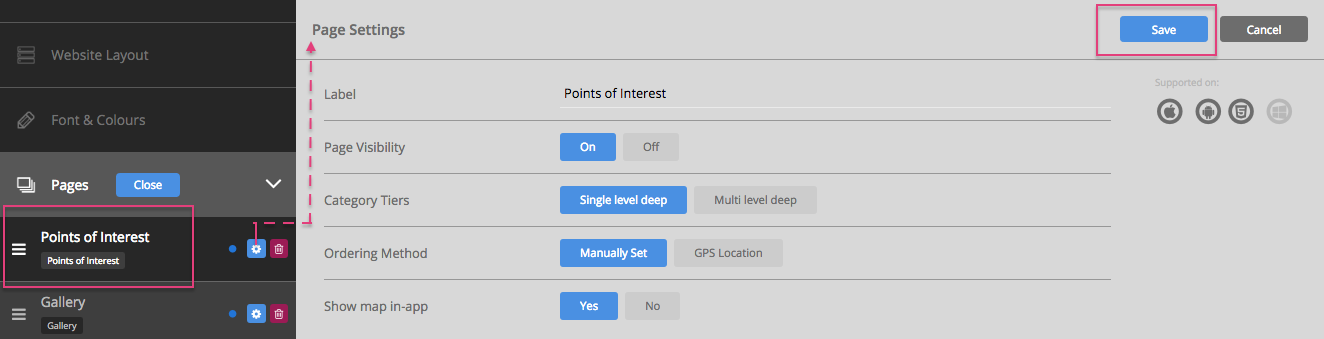
Now press the cog on the right of the page you’d like to make changes to (under the Pages tab on the navigation panel).
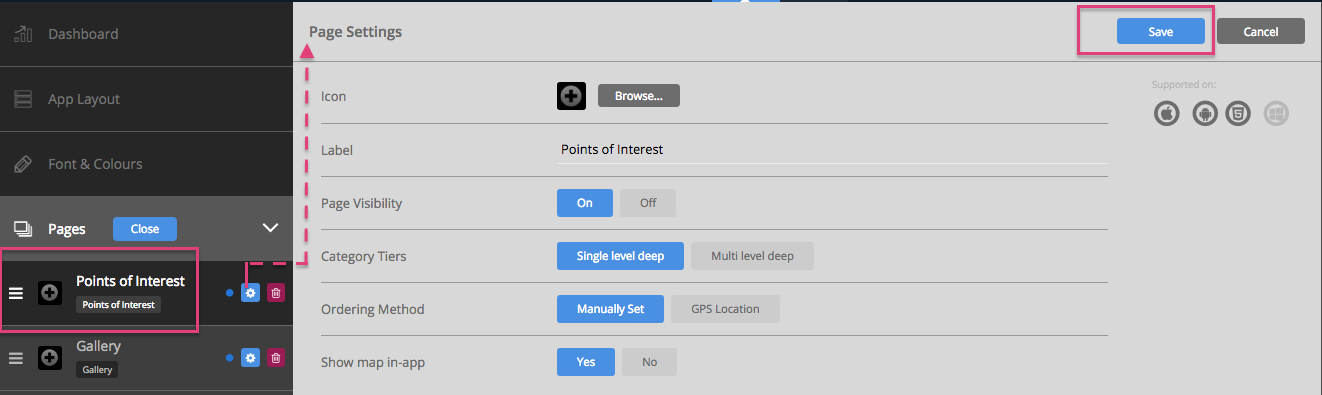
Edit the name of the page by adding in a new one, in the space provided for ‘Label’.
Page Visibility is set to ‘On’ by default. This shows a blue dot next to each Page (on the left of the cog on the navigation panel under ‘Pages’). Please click on ‘Off’ if you want to make the page invisible. The dot appears grey when you make the page invisible.
Choose the Category Tiers to be either a ‘Single’ or ‘Multi Level Deep’ category list. A ‘Single level deep’ tier lists everything out on the menu including categories and sub categories. The ‘Multi Level Deep’ view categorises each category into folders.
Select whether you would like your locations to be sorted manually in the Ordering Method section, or by GPS location (great for a user to find a location closest to them)
Also choose whether to show the map for the places listed, in-app.
Please click on ‘Save’ on the top right of this section when you’ve finished customising the page.
Note# You can change the page ordering or how it is listed, by clicking on the little button to the left of that page and dragging it to a different position.
For App View
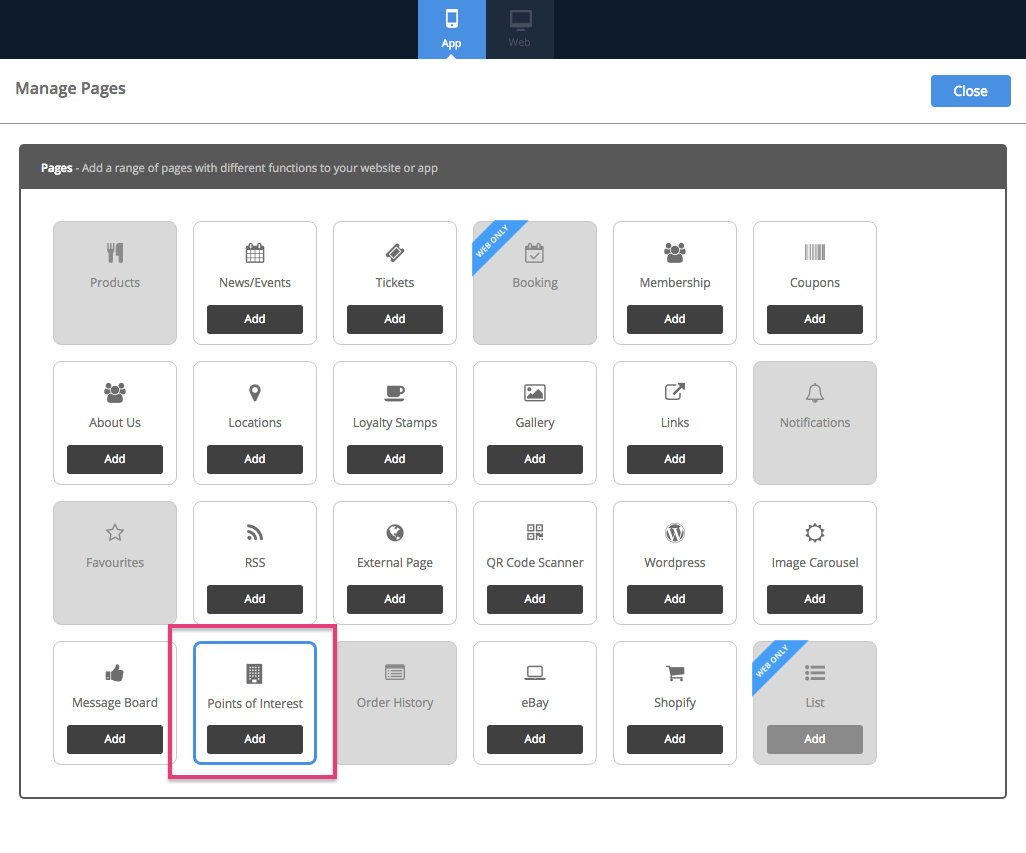
Please make sure you click on ‘App’ at the top of the CMS to change to App View.
To add pages to your app click on the ‘Pages’ tab on the left side navigation panel. Once you have clicked the ‘Pages’ tab, you will notice a blue ‘Manage’ button that will appear alongside the tab. Click this button to show the range of pages you can add to your app.
To add a page, press ‘Add’ at the bottom of each page/feature in the library. Once you’ve added it, click on Close.
Tip# If you’ve already added this page to your Website, you’ll see it added even when you switch to App View.
After the page has been added, you’ll see it under the ‘Pages’ section of the navigation panel on the left.
If you would like to change the name of a page and/or add an icon, click on the Manage button next to the Pages tab on the navigation panel.
Now press the cog on the right of the page you’d like to make changes to (under the Pages tab on the navigation panel).
To choose an icon or to upload your own custom icon press the ‘browse’ button. Choose an icon from the list provided, or to upload your own icon press the ‘upload custom icon’ tab. To upload your custom icon drag and drop you 60 x 60 pixel image into the blue area, or press browse to find your icon manually. Press set when you have chosen your icon.
Edit the name of the page by adding in a new one, in the space provided for ‘Label’.
Page Visibility is set to ‘On’ by default. This shows a blue dot next to each Page (on the left of the cog on the navigation panel under ‘Pages’). Please click on ‘Off’ if you want to make the page invisible. The dot appears grey when you make the page invisible.
Choose the Category Tiers to be either a ‘Single’ or ‘Multi Level Deep’ category list. A ‘Single level deep’ tier lists everything out on the menu including categories and sub categories. The ‘Multi Level Deep’ view categorises each category into folders.
Select whether you would like your locations to be sorted manually in the Ordering Method section, or by GPS location (great for a user to find a location closest to them)
Also choose whether to show the map for the places listed, in-app.
Please click on ‘Save’ on the top right of this section when you’ve finished customising the page.
Note# You can change the page ordering or how it is listed, by clicking on the little button to the left of that page and dragging it to a different position.
Adding Points of Interest
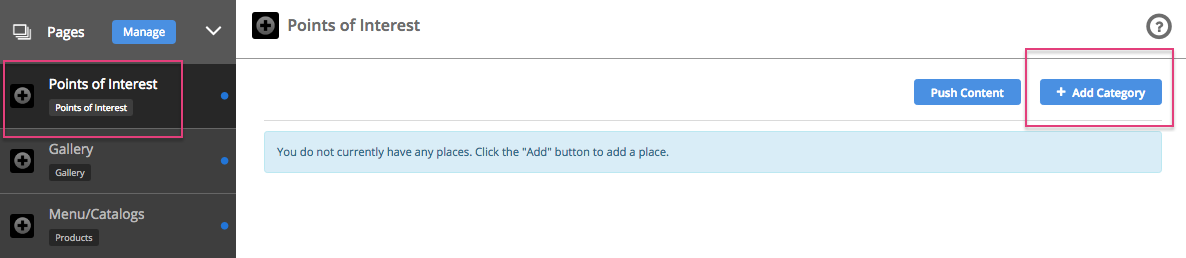
Go to the Pages section on the navigation panel and click on the ‘Points of Interest’ page.
To starting adding places you will first need to set up a parent category.
Press ‘add category’
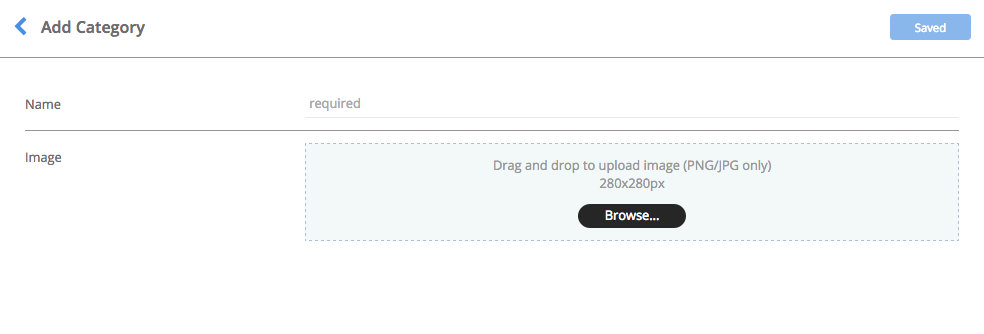
Name your category that you would like to list places under e.g Restaurants. Add an image if you would like and press save.
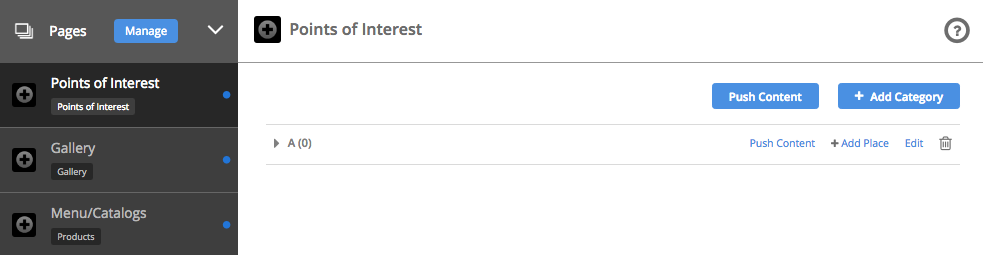
The category you just created will now show up on your Points of Interest page.
To add items within your category press ‘add places’ on the right of your category listing.
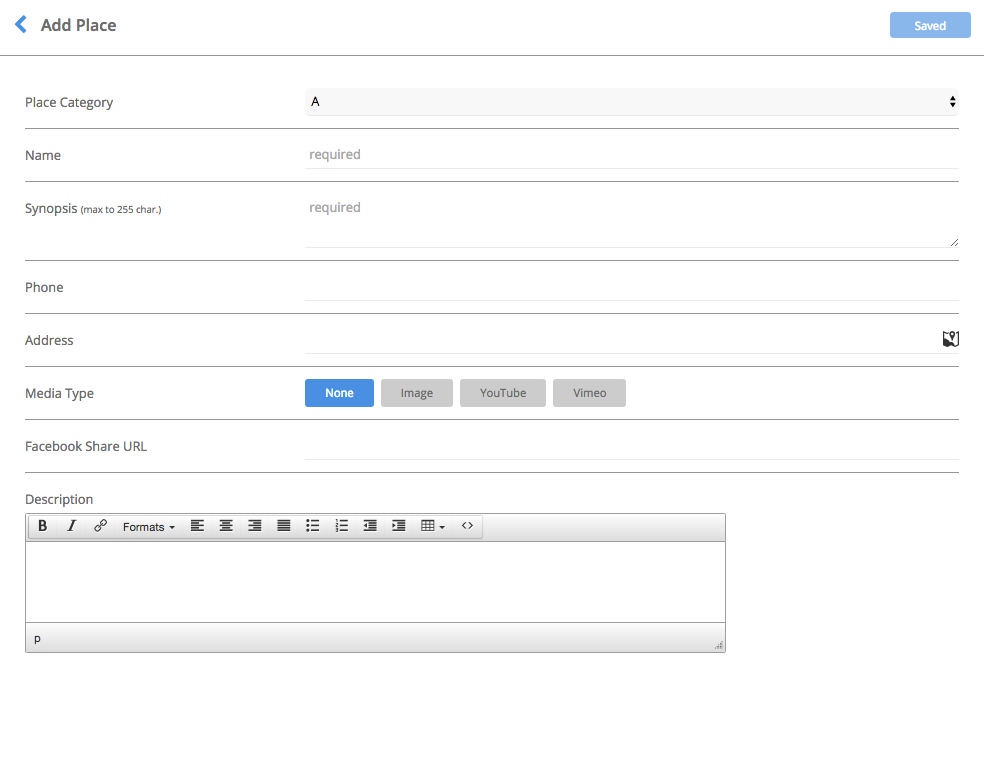
Fill out the information about your places listing including name, description and phone.
If you would like your address to show enter the locations details (if you have selected to sort by GPS location then these are the details it will pull from).
Choose to add media – maybe an image or a video.
Press save once you’ve finished inserting your details.
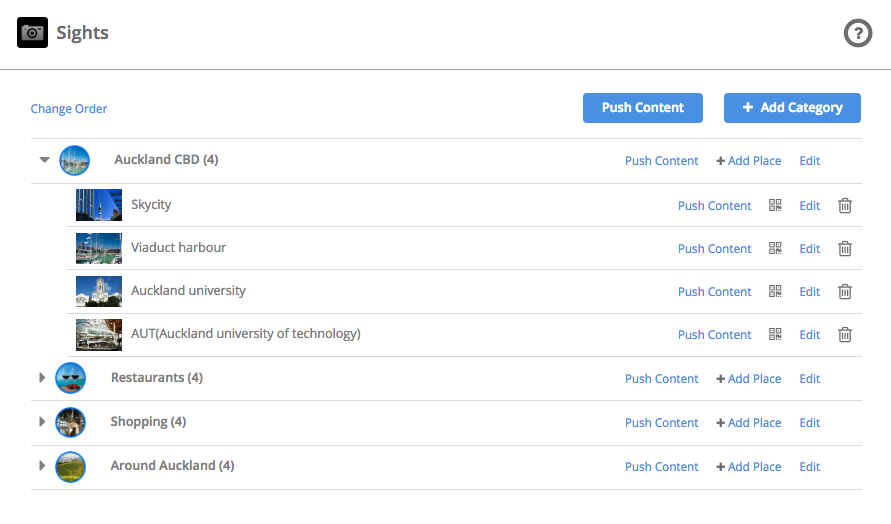
Your place will now appear underneath your parent category
To add a new place or category follow the steps above.
If you have chosen to manually order your places then press ‘change order’ located on the left of your categories list. Drag and drop where you would like each place to appear.
You can edit or delete each place at any time by pressing the edit and trash bin icon alongside each place listing